Hi there,
Firstly apologies if this has been posted addressed many times, happy to be directed to the relevant thread if need be?
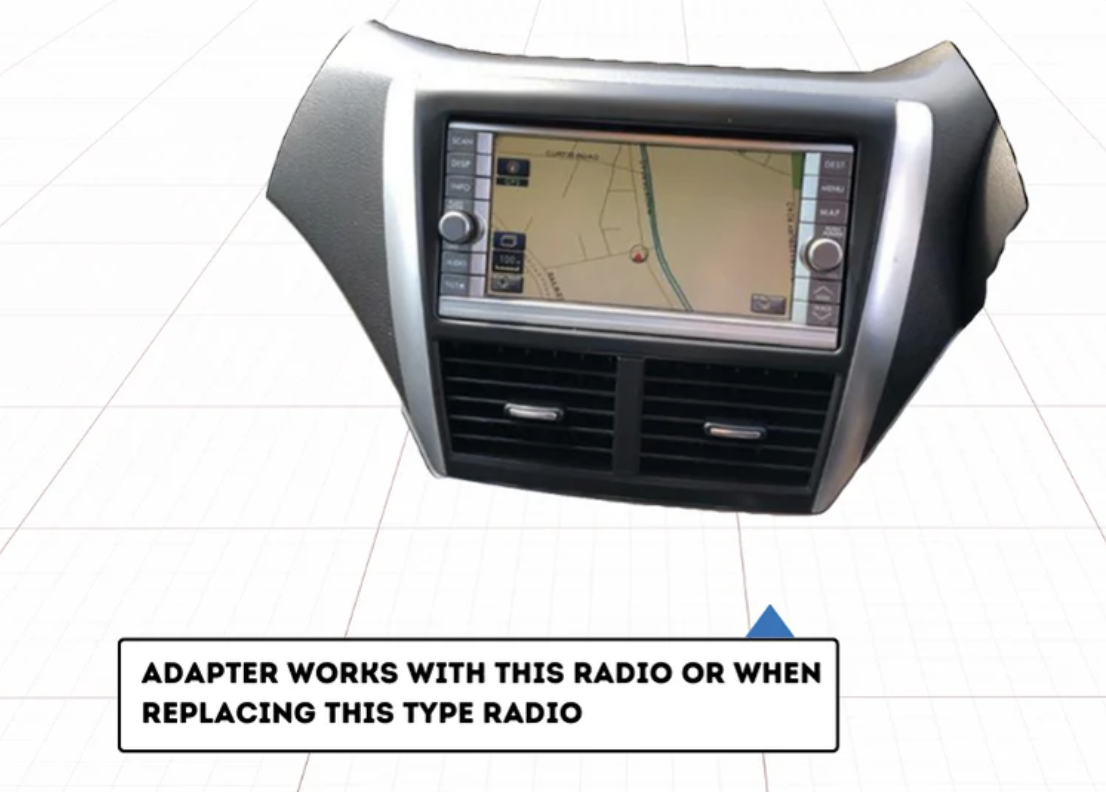
Firstly, I live in Australia and have a 2011 XT Premium (not sure what the equivalent is elsewhere) but it has the factory Kenwood sat nav see link (this is exactly what i have)


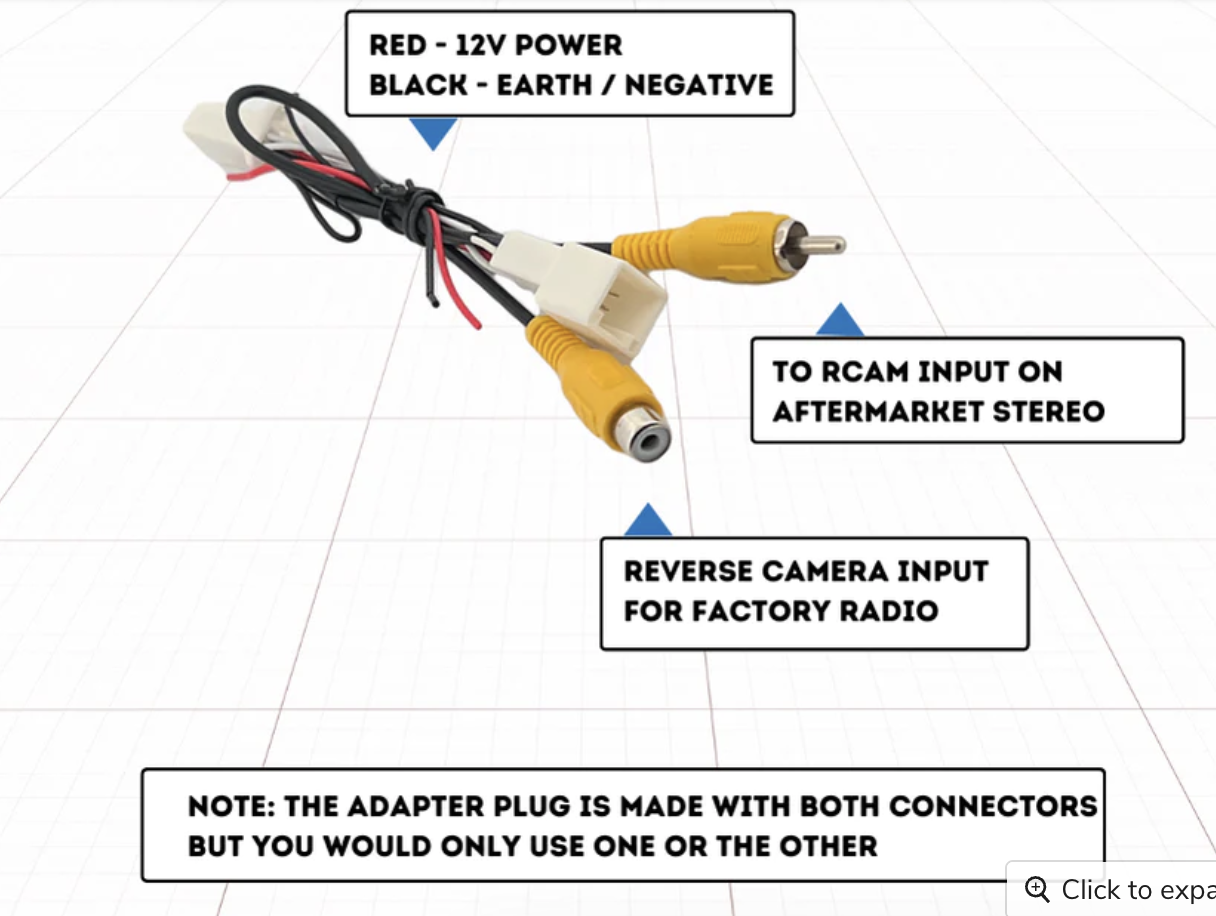
. I've been told this this plug works AutoChimp Reverse Camera Adapter for Subaru | 8 Pin Camera Plug Subaru | Retain Reverse Camera for Subaru | Universal for All Stereos
But i'm also told that i'd need a 12v6v reducer also. Further, I only want the reverse camera to activated when in reverse so i need to tap into the reverse trigger wire. My question is, is there an easier way to do this without running a wire to the rear brake light? If there is no other way, i might as well just buy a new reverse camera which i really don't want to do as i'm not keen on doing. I'm just working my way through so many forums and vids but haven't found anything with my specific requirements i.e head unit, adapter shown above and where to tap into reverse trigger. If anyone has experience with this that they could share, that would incredibly helpful and appreciated. I am by no means proficient in wiring and electronics but managed to installed my head unit now the basics. If you have any pictures of which wire and what it looks like after you tap into the reverse trigger, that would be excellent. Or if you have something like this plug and have successfully hooked it up and tapped into reverse trigger, even better
Thanks in advance
Firstly apologies if this has been posted addressed many times, happy to be directed to the relevant thread if need be?
Firstly, I live in Australia and have a 2011 XT Premium (not sure what the equivalent is elsewhere) but it has the factory Kenwood sat nav see link (this is exactly what i have)
. I've been told this this plug works AutoChimp Reverse Camera Adapter for Subaru | 8 Pin Camera Plug Subaru | Retain Reverse Camera for Subaru | Universal for All Stereos
But i'm also told that i'd need a 12v6v reducer also. Further, I only want the reverse camera to activated when in reverse so i need to tap into the reverse trigger wire. My question is, is there an easier way to do this without running a wire to the rear brake light? If there is no other way, i might as well just buy a new reverse camera which i really don't want to do as i'm not keen on doing. I'm just working my way through so many forums and vids but haven't found anything with my specific requirements i.e head unit, adapter shown above and where to tap into reverse trigger. If anyone has experience with this that they could share, that would incredibly helpful and appreciated. I am by no means proficient in wiring and electronics but managed to installed my head unit now the basics. If you have any pictures of which wire and what it looks like after you tap into the reverse trigger, that would be excellent. Or if you have something like this plug and have successfully hooked it up and tapped into reverse trigger, even better
Thanks in advance

